We no longer support this browser. For an optimal experience, we recommend updating your browser.
How to set internet access schedules
Use the CenturyLink app to schedule blocked access time for a group of devices on Premium WiFi.
Note that schedules are created to BLOCK access to the internet during certain times. Outside of the scheduled times, access will be allowed.
Scheduling internet access
Before you can schedule internet access, you need to create a group of the devices you want to set the schedule for.
You can instead pause access for a single device at any time, without creating a schedule.
Once you have devices assigned to a group, follow the steps below to set a schedule.
- Step 1
- Step 2
- Step 3
- Step 4
- Step 5
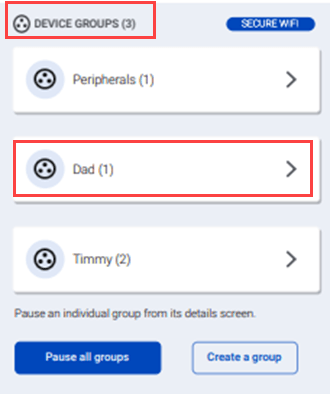
1. After you've created a group, select it from the Groups section of the Internet screen.
2. From the Group Details screen, scroll down to the Scheduled Access Time section and tap the button to Manage access schedule.

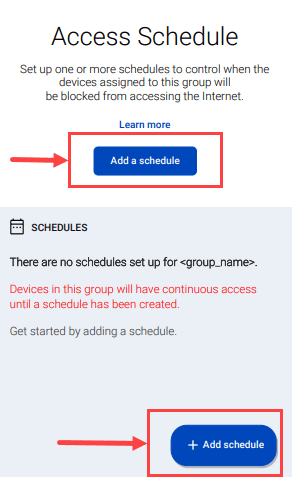
3. Tap on the Add a schedule button from the Schedule Access screen.
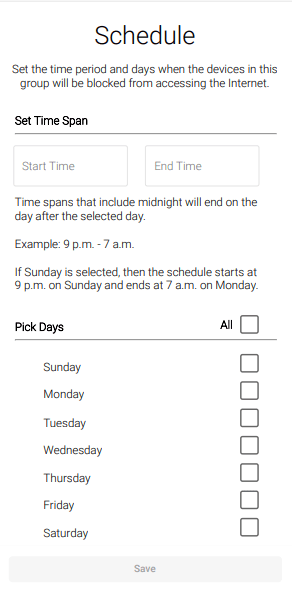
4. Select the days of the week and the times you want to block the devices in the group from accessing the internet.
Tap the SAVE when you've made your schedule.
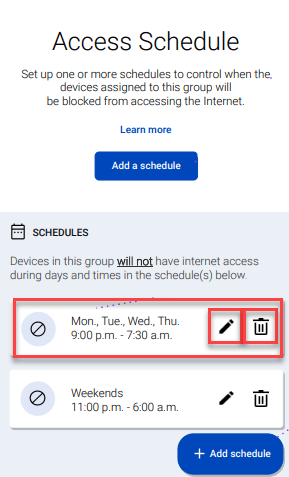
5. After you've created a schedule, you can edit or delete it from the Access Schedule screen.
Was this information helpful?
Support topics
About Lumen | About CenturyLink | Careers | Investor Relations | Newsroom | Legal | Privacy Notice | Tariffs | Customers with Disabilities | Site Map | Cookie Settings | CenturyLink in Your Area | CenturyLink.net | Quantum Fiber in Your Area | White/Yellow Pages | Centurylink Retailer
Residential | Small Business | Enterprise | ©2025 CenturyLink. All Rights Reserved.